|
Painting 101:
Different techniques in watercolour
by Tissa Hewavitarane
The watercolour is very sensitive to any alteration that is produced
on its surface. This quality is an advantage when the techniques that
provoke such changes are known. When using watercolours, accidents often
happen, such as a scratch of the paper scraping with the brush.
There are many techniques that normally can be used to alter the
surface of watercolour. One of the most usual tools in the studio of a
water colourist is the hair dryer. This can speed up the water
evaporating from the paper. Another tool that can modify surface of the
paper is sandpaper, for instance the dark colour is painted in the used
way.
|
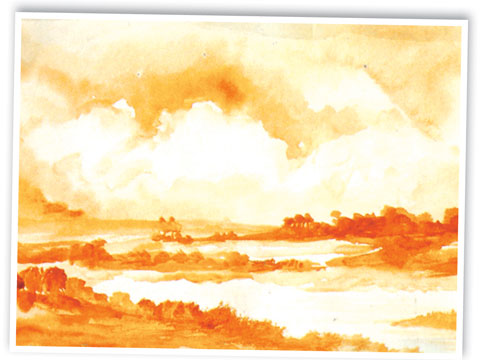
A landscape painted in one colour using burnt umber. |
Even take masking solution. Many artists use it in many of their
paintings and it really does fulfill a useful purpose, like painting it
on a white sails of a fishing boat. In using the sponge a little touch
occasionally might be appropriate for things as light trees, but to base
your painting style around it would be disastrous. There is also a
little trick of flicking your fingernails into a damp wash which is
useful occasionally for such things as sunlit grass against a dark tree.
In water colour once put on paper is there for good and can't be
altered, which is why so many would be so many water painters don't try
it out. The truth is of course very different. Whole area or sometimes
the whole painting can be washed off and repainted without any one being
any the wiser.
Fingernails and knuckles
The occasional flick with these fingernails in a damp wash can be
quite effective for sunlit grass or branches. The knuckle can create
textures such as rocks.
Masking tape
This a strong adhesive tape which attaches itself to the paper but
easily peeled off afterwards. It can be cut or torn to mark out
uncomplicated shapes or to give you a sharp straight edge to a wash.
Candle Wax
This too can be used as a resist and gives a sort. Of batik effect.
It should be used very sparingly to suggest light sparkles on a lake or
to create texture. Remember the wax cannot be removed afterwards - it
becomes the part of the picture itself.
Pointed sticks and cardboard strips
Pointed sticks dipped in watercolour can be used to draw branches and
cracks in stone walls. You should try it on both dry and damp paper. Cut
out some assorted strips of heavy cardboard from half inch into three
inch in wide and long enough for you to get a good grip. Again try them
in various ways.
Painting knife
Before you try this tech you must remove every trace of grease or
varnish or oil paint by using a household cleaning powder, otherwise the
watercolour will not stay evenly on the knife. If this doesn't do the
trick, stick it in a lemon and leave it overnight. There are all sorts
of ways of applying watercolour with a knife, and again experimenting
will show you how. You hold it as if you were going to cut the paper
with tip and produce fine lines for twigs, weeds and ships' rigging. You
can use the edge of the knife laid on precisely to indicate distant
walls of short sideways strokes to paint birch trees. By scraping
already applied paint in a sort of spreading butter motion you can
produce interesting textures. It can also be used to apply masking fluid
either in precise strokes or by dipping the knife in the fluid and
flicking it onto the paper with your finger. Again, this produces
interesting foreground textures.
Experiment yourself
Apart from describing the main pitfalls, there's no way one can
really explain the technique. You just have to experience it and
experiment yourself. Try it out with just one colour first, say burnt
umber and be prepared to waste a few sheets of drawing paper. Let
yourself go fearlessly, don't be timid. Always have the painting on a
slope and use gravity to help you, which can be rather like swimming
with the current. It's so much less effort and you'll need less strokes.
The technique is ideal for doing such things as cloudy skies, mists,
below trees and surging surf, but don't attempt to do the whole painting
in wet-in-wet, it will just look out of focus. It's much more effective
when the soft edges are contrasted with sharp edged areas and
calligraphy, applied after the paper has dried or almost dried. When
running colours on to a saturated paper, be sure they are quite intense,
since they will dry lighter. Remember that the water in the paper
dilutes the colour as it flows from the brush, so the fresh colour needs
to be put on relatively dry, if it's to stay in place.
Non verbal explanation can tell how it is - the process must be
expressed. The wet paper is usually worked on while flat, because a
slanted surface will cause colours to run toward the bottom of the
sheet. This could be desirable in some cases. Rough textured paper
generally work better than smooth. Do practice these techniques,
although it probably won't come off at first but it will help you to
improve your skill to turn out a better painting.
www.tissahewavitarane.com
|