|
Learn to draw by Tissa Hewavitarane:
Ways to start a watercolour
Since no two artists paint alike, they do not follow the same
procedure in developing their work. But several steps might help to get
things started. Classrooms often provide still life and model materials,
while sketchbooks, photographs and imagination can add hundreds of
ideas.
Small sketches are valuable in preparing the composition of major
elements. Make about two by three inches pencil sketches of the main
objects.
This is where arranging and rearranging should take place. Plan the
design and provide for the centre of interest. Make several quick
studies and select the one you like best. Transfer the sketch to the
water sheet, taking care to keep the same proportions. Do not get too
fussy with detail in this drawing concentrating instead on the placement
of large shapes only.
|
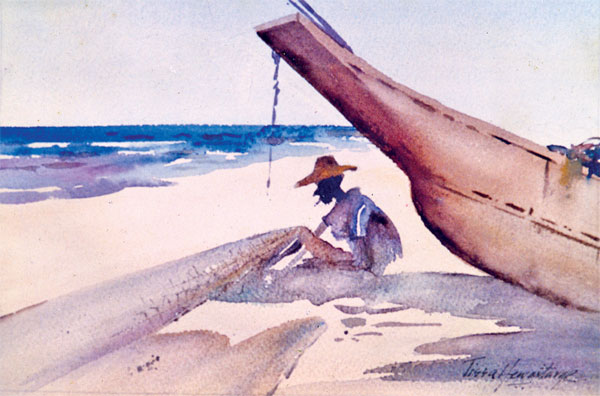
A fisherman mending the net – pure wash painting done on dry
paper |
Begin flowing light colours in large areas with a big brush. Use big
strokes and do not worry about details. Wash in all sky and large
shapes, negative and positive. Let areas dry before continuing, unless
you purposely want them to run together.
Darker areas are added next, working from light to dark. Paint colour
and value shapes only - not leaves, boards or windows. When these areas
are dry, the details can be painted in with smaller brushes in darker
values.
Colour areas can be altered by pulling colour washes over them and
texture, lines and characteristic features can be added.
Pure wash paintings on dry paper are seldom done any more, although
in the past, many artists use the technique almost exclusively.
Washes are large areas of colour applied evenly to the paper
producing flat colour shapes. Usually several loaded brush full are
required to cover the area.
The easiest way to apply are washes that can be laid from top to
bottom. Start on a slanted surface and mix enough colour to cover the
surface. Use the largest brush possible and load it with the mixture,
applying it quickly in long even strokes. Keep the bottom of the wash
very wet (leave the ridge of colour wetness there) apply the next brush
full.
Repeat the process until the desired area is covered. Use the
squeezed out brush or blotting paper to absorb the excess from the
bottom of the shape, or else it will bleed back into the wash area as it
dries producing an unwanted cloud or sunburst.
Clear skies and large flat shapes can be achieved only by using one
of the wash techniques. Try each type several times to test your ability
to control the application of such washes. Coloured washes can be
applied over dry washes to attain luminosity, contrasting shapes or to
darken the previous wash. |


")


