Learn to drawDrawing and painting trees
Part II
In the past lesson I brought out the basic structure in drawing and
painting trees. For a good tree to be featured as the main subject of a
picture you must know how to produce a realistic looking bark.
 |
|
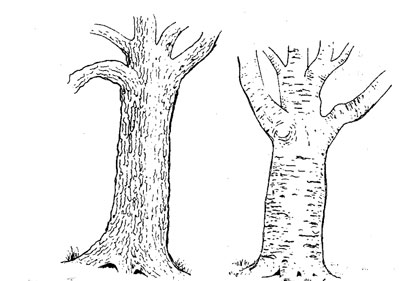
Fig 1: Oak tree, Willow
tree |
A point to remember, with trees, is to draw one side in shadow, with
markings more detailed than the opposite side. This helps to create
depth and shape. If you use the same way of depicting the bark for the
whole trunk, it will look flat. Make one side lighter with less detail.
The willow tree is another common tree which is fine to draw. The bark
lines go around the trunk and are smooth compared to those of the oak.
The oak tree often drawn or painted by artists, is nice to sketch.
The bark is composed of rough, deep ridges, with many cracks and
crannies. These trees have, sometimes twisted branches. The two
different types of trees shown on Fig 1.
 |
 |
|
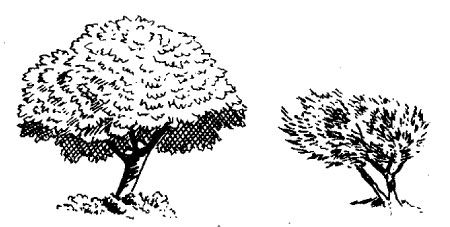
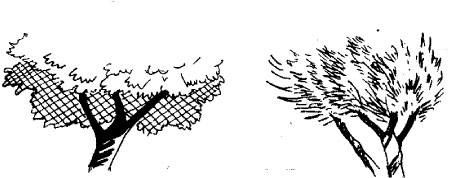
Fig 2 and Fig 3: How to suggest foliage |
However, to draw a tree accurately, you need to know how to obtain
the detail effects of bark, branches and foliage. What problems must you
solve? First ask yourself what shape the tree is. Is it round, tall or
spread out? What do the leaves look like? Are they fine, broad, pointed
or odd shaped? What is the bark like? Smooth, craggy, ridged, ringed,
ringed or what?
Observe and study carefully how to depict foliage trunk and branches.
Notice how dark shadows help to give the trees depth and form. Fig 2 and
3 illustrates how to make your foliage. The trees were shaded after they
were drawn, with light, short strokes with pen and ink and were
cross-hatched to give deep shadows.
In all cases when you're painting trunks and branches, start from the
base of the tree and work up. Each species of tree has its own
characteristic silhouette or basic profile. Branch structure is
different too. 'Y' fashin oak branches in an erratic sickle shape while
the willow often have a 'V' where the branch joins the trunk, as
illustrated in Fig 1.
 |
|
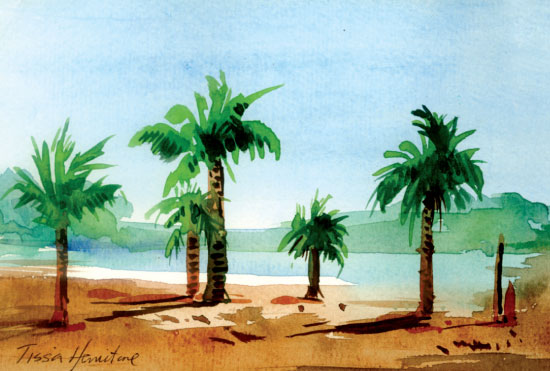
Fig 4: Shows how a group of trees by the
lakeside. A simple wash drawing without any detials |
It's important that you get into the habit of looking at trees
analytically with these points in mind before you even get your brush
out. I'm often asked, Do I paint the foliage first and add the trunk and
branches afterwards, or paint the trunk and branches first and add the
leaves afterwards?
Look at the tree first and decide which is the more dominant. Fig 4
shows how a group of trees by the lake side.
A simple wash drawing without any details and using three colour,
ultra marine blue, burnt sienna and Hookers green. Brushes used Nos 2,3
and 8 sable hair with 250 gms Kent drawing paper. |


")
